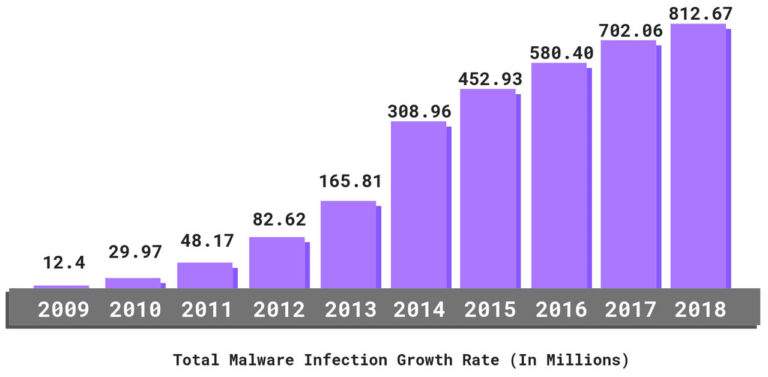
Before the upsurge of email marketing, ISPs have led a relatively calm life: they have managed a small number of emails and efficiently fought spammers and hackers. However, things have changed dramatically.
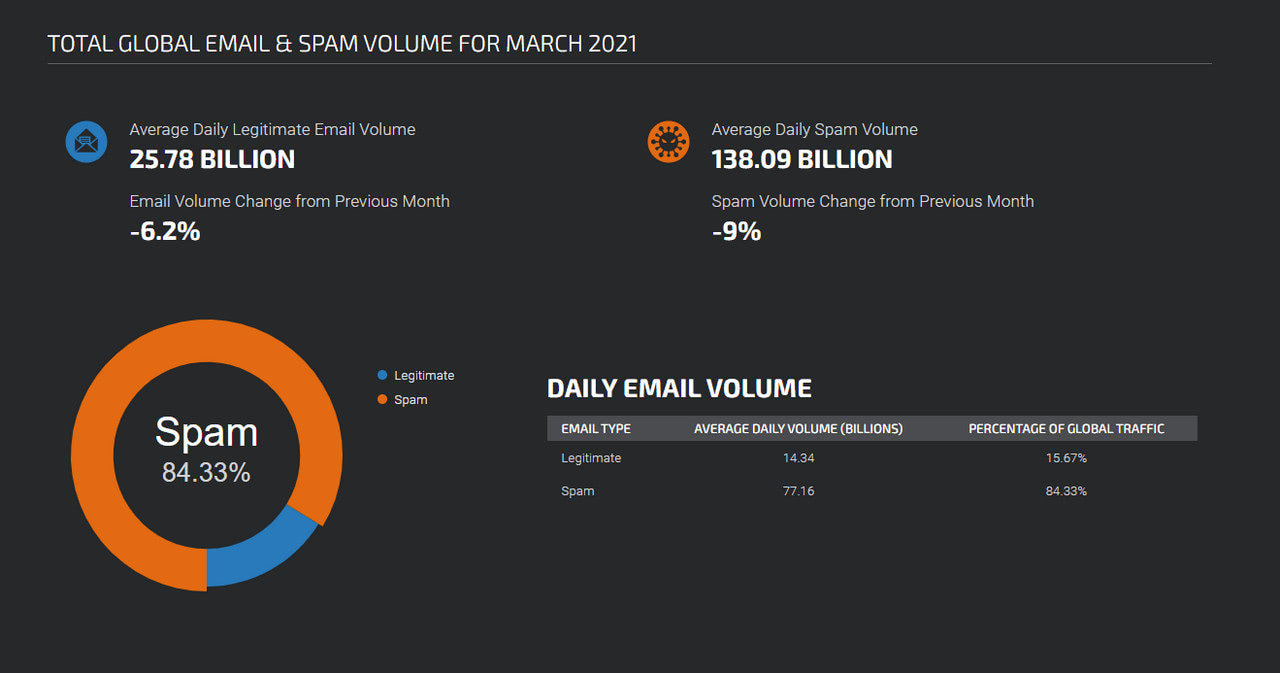
With the internet becoming easily accessible and email marketing drastically growing in popularity, the number of emails sent and received globally has reached a staggering 306 billion lately. That would be okay if these were just newsletters sent by email marketers or people involved in personal correspondence. However, according to recent studies, more than 80% of all emails sent these days are spam or attacks. This egregious situation with online threats has put ISPs under a lot of pressure since maintaining email connections clean and healthy has become very difficult.
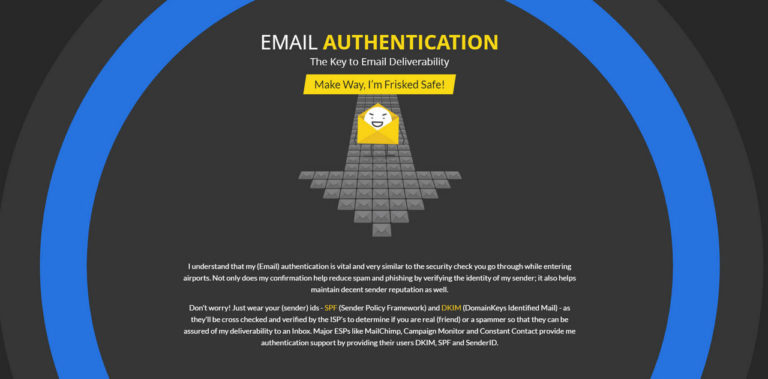
To address this issue and provide a safe environment for users, ISPs have come up with several solutions. They have created filters and various protocols to check whether emails are trustworthy. However, as it turned out, this is not enough since it is a two-way task. The senders, especially those who run email marketing campaigns and exploit third-party services, need to ensure email authentication as well. To be more precise, they need to create an SPF record that addresses external factors, such as spoofing.
It may sound tricky, but in fact, it is not rocket science. To see the bigger picture and get the grasps of the SPF record, we are going to walk through SPF meaning and find out how you can create SPF records without additional help from tech specialists. In the end, we will consider some good SPF record check tools that help to avoid banal mistakes, saving you lots of time and money.
Though, first things first – what is SPF?
What is SPF?
Sender Policy Framework, aka SPF, is one of the several popular open public standards used in the never-ending battle with spam and scam.
To grasp SPF meaning, you need to understand just one thing: SPF is just a list of senders that the owner or the service officially allows to send emails. In a word, it is a text file that authenticates the sender of an email.
The main task of SPF is to help Internet Service Provider to make the right decision about the email by providing information whether the mail server is authorized to send newsletters for a specific domain.
How does the SPF authentication process work exactly?
How Does SPF TXT Record Work?
What is SPF Record?
Before moving to the principles of SPF, it is crucial to understand what is SPF record, since SPF is a standard, not a tool to impose authentication.
Simply put, an SPF record is a text file that lists IP addresses that have permission to send emails on your behalf. It may include:
- the IP address of in-office mail server (e.g., Microsoft Exchange) or your server;
- the IP address of your internet service provider;
- the mail server of your end users’ mailbox provider;
- IP addresses of third-party servers, such as popular email service providers.
To create an SPF record, you need to adhere to a specific format and syntax. Although it may sound tricky at first, yet having a correct and accurate SPF record does not require special technical skills. Everything is straightforward. We will cover the basics lately. First, let us find out how does SPF works.

How Does SPF work?
In general terms, the SPF works this way:
- It starts with the sender side when the user or system publishes an SPF record in the DNS.
- After the email was sent and transferred to the recipient, the “receiving” server does two crucial things:
- It gets the SPF record from the return-path address in the email’s headers.
- It conducts an SPF record lookup to compare the IP address of sending mail server with authorized ones.
If the message originates from a server on a list, the mechanism establishes a link between email and the email domain and grants it a “pass” status.
Note, even if the link between email and the email domain is not established, the message can still be delivered. The receiving ISP makes the final decision about the email’s fate, depending on its policy and criteria. Besides, not all mail servers favor SPF authentication because it has shortcomings, for example, the list of senders might be inaccurate, or the email itself is fake. SPF is only one of the few things that ISP uses to define what to do with the correspondence.
With that being said, even though the SPF record is not perfect, it still provides an extra layer of protection. It should not be taken lightly. Let us find out why is it important to create an SPF record.
Why Is It Important to Create SPF Record?
Even though the SPF record is one of many factors that ISP considers when deciding on email’s fate, it is still imperative. First and foremost, it ensures your emails won’t be rejected without any trial since some ISPs ignore emails whose legitimacy they can’t determine.
On top of that, with an SPF record in place, you get a fighting chance to
- protect your email domain against spoofing, phishing attacks, ransomware, malware, financial loss, and fraud;
- strengthen the overall security of your domain;
- enhance the trustworthiness of your resource;
- ensure the legitimacy of your emails that is very important for mail servers and ISPS, especially such big players like Gmail or Outlook;
- improve your deliverability rate that has a significant impact on open rates and conversion rates as well as overall email marketing campaign;
- reinforce sender reputation that, in its turn, improves brand reception.
On top of that, the SPF record helps to impede a mail server’s healthy operation and make the web a better place where regular users may feel safe, bring value to others, and run their businesses smoothly.
It is also vital to create SPF record because it is one of the foundational methods of email authentication for DMARC that plays a crucial role in ISP decisions on how to treat a received email.
How to Create an SPF Record?
As we have already gotten from SPF meaning, the SPF record is a properly formatted text file that lists trusted IP addresses using specific syntax. Let us walk through the essentials of this process so that you can nail it on your own.
Step 1 – Gather Trusted IP Addresses
Before opening Notepad (or whatever text editor you have at hand), it is crucial to lay the groundwork. So, start with picking out mail servers you use to send emails. These include
- Corporate server, like in-office Microsoft Exchange or web-based like Gmail.
- The email service providers. The third-party services that you use to run email marketing campaigns like Mailchimp, etc.
- The mail server of your ISP.
- The miscellaneous services like payment providers or support systems.
On top of that, it is vital to include inactive domains to protect them from abuse.
Step 2 – Make a List of Domains
The rule of thumb, each SPF record refers to a specific domain. Therefore, you need to list every domain you control, even those that are “parked” and not currently used.
The reason for that is banal; the hacker will try to spoof all your domains, regardless of whether they are sending or non-sending units. To reinforce SPF, you need to ensure the whole system is protected, including inactive elements. Overall protection is what stops spam, spoofing, and other online threats.
Step 3 – Create SPF Record
Before jumping into an SPF record, it is crucial to define at first what the “receiving” side should do with your illegitimate emails. For example, you may ask the server to reject all non-authorized emails or accept but mark them as spam.
After that, follow this simple 5-step routine:
1. Open the txt file. At the beginning of the new line, type “v=spf1,” which indicates an SPF record. Use only the “spf1” version since other versions are outdated and unsupported.
2. List permitted IP addresses. It should look like this:
v=spf1 ip4:7.7.7.7
If you need to add more than one IP address (that is a case usually), list them one by one. No commas, only blank spaces. It should look like this:
v=spf1 ip4:7.7.7.7 ip4:9.9.9.9
3. Add third-party services using the “include” statement, like this “include:thirdpartydomain.com.” For example, if you use Mailchimp, the result SPF record may look like this:
v=spf1 ip4:7.7.7.7 ip4:9.9.9.9 include:servers.mcsv.net
Here servers.mcsv.net is a verified Mailchimp domain.
If you use Google apps email (Gmail), you may also add this statement “_spf.google.com/.” The result SPF record may look like this:
v=spf1 ip4:7.7.7.7 ip4:9.9.9.9 include:_spf.google.com include:servers.mcsv.net
However, note, it is highly recommended to have a single SPF record for both Gmail and third-party services, like this
v=spf1 include:_spf.google.com include:servers.mcsv.net
4. End each SPF record with the “all” flag. The latter has several meanings:
- “-all” means reject all non-authorized emails;
- “~all” means accept but mark all non-authorized emails;
- “+all” means any server can send an email from your domain that is highly inadvisable since it leaves the server open to spoofing.
The result SPF record should look like this:
v=spf1 ip4:7.7.7.7 ip4:9.9.9.9 include:_spf.google.com include:servers.mcsv.net –all
5. Last but not least. Protect all the domains. For the sake of security, all the domains, even those that are “parked,” should be listed in the SPF record. For this, at the end of the file, add the string
v=spf1 –all
As you can see, creating an SPF record is a simple task. However, nothing is perfect: mistakes happen all the time. To avoid them, consider some ground rules.
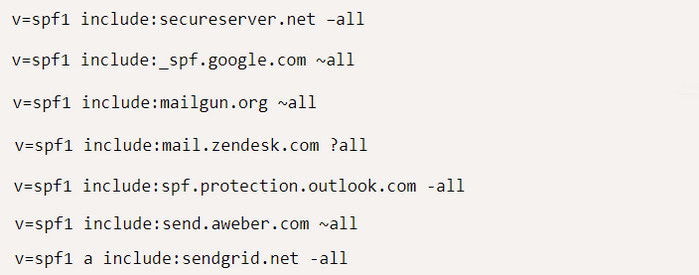
Popular SPF records
Ground Rules of SPF Record
There are some ground rules that you need to follow to secure a valid SPF record, such as:
- Use “mechanism” to describe the set of hosts.
- Use modifiers only once per record and only at the end of it.
- Always start the SPF record with the “v=” element.
- The version should always be “spf1“.
- Strip away extra spaces before the start and after the end of the string.
- Double-check for misspellings in mechanisms and referenced domains.
- Remove all upper case characters in mechanisms.
- Do not use commas.
- Use only one space in between each mechanism.
- Limit DNS-querying mechanisms that require lookup inside a single SPF record to ten.
- Use no more than 255 characters.
Troubleshooting
It sometimes happens that SPF record without any visible mistakes still fails its mission. In this case, you can try to do two things.
The first one is to copy and paste the content into a non-formatting text editor because some word processing applications, especially MS Word, may generate unintended formatting. On top of that, if you copy and paste from an email straight into DNS, it may also cause the same problem, therefore strip away all the clutter.
The second thing to do is to check SPF record syntax in diagnostic tools. They test SPF records for compliance with the RFCs and show whether the SPF record has been published correctly to give you some hints on mistakes.
Tools to Validate SPF Record
To check and double-check SPF record, consider these popular tools:
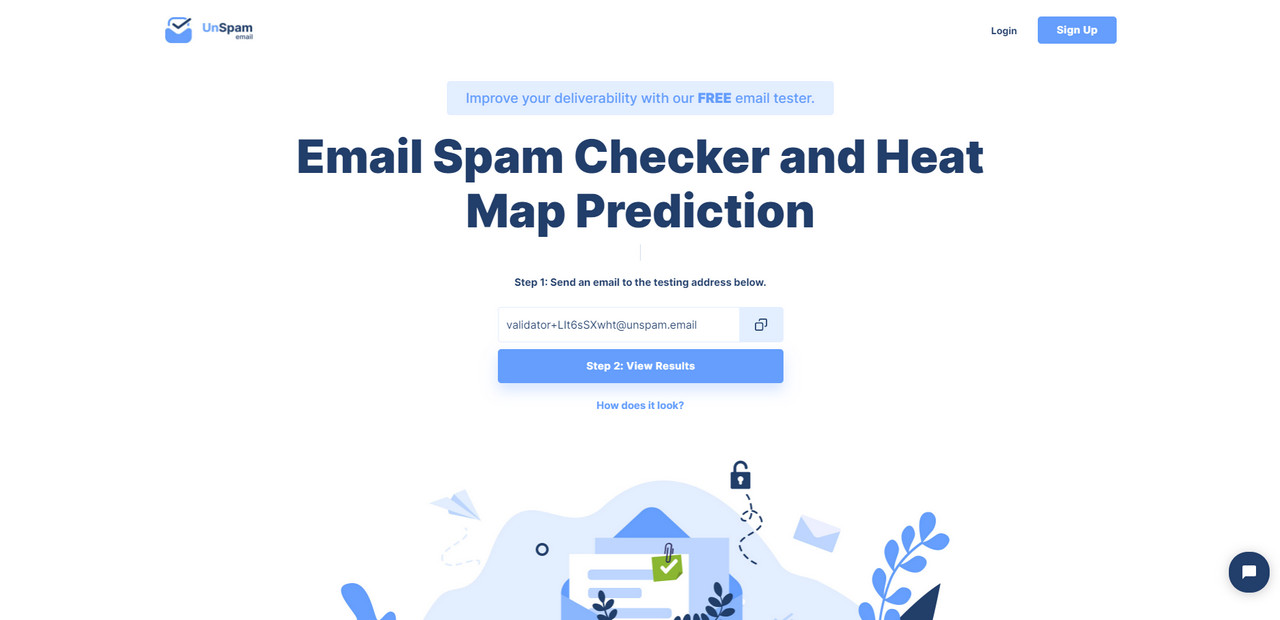
- Unspam. As a powerful all-in-one monitoring tool, it provides a bulk of valuable information, including a report about the SPF record. It checks for duplicates, authorization, and more.
- SPF Record Check by Dmarcian. This diagnostic tool presents its results in a graphical form so that everyone can get the key points. It shows whether your SPF record is correct and pinpoints possible mistakes in the formatting.
- SPF Record Check by MXToolbox. MXToolbox runs a record lookup and validates the SPF TXT record.
- SPF Record Testing Tool. Along with testing SPF records, this tool also gives you answers to such crucial questions as “Is SPF record valid” or “Does your domain already have an SPF record.”
- SPF Record Check. The service combines three tools in one: it is a lookup tool, generator, and validator.
Use these tools to do regular checks of SPF records as well. It is crucial to see whether legitimate IP addresses are listed or you need to update them. Besides, you can gain the recipient’s point of view to create a more polished SPF record.
How to Add SPF Record to DNS?
As a part of the domain’s DNS, the SPF record should lie in the bowels of the domain. So, you need access to your DNS control panel.
If you use a hosting provider, then you can address this issue to the support team or use a supporting guide to put the SPF record in its proper place. As a rule, all the hosting providers have a mechanism for creating SPF records in a clean and intuitive way.
If you run your server, then cPanel provides an intuitive interface for generating an SPF for outgoing mail protection.
The important thing to note here. Do not expect the new SPF record to come into effect immediately. Usually, it takes from 24 to 48 hours. So, consider this delay.
Conclusion
SPF record has been standing guard over the safety of email correspondence since 2003. It eliminates a high proportion of the bouncebacks, increases the trustworthiness of emails, protects brand reputation and sender reputation, and secures the connection with the customers.
The great thing about SPF is, you do not need to understand the ins and outs of SPF to enjoy its benefits since the “receiving” server does all the heavy lifting. All you need is to create an SPF record for your specific case.
And, even though SPF does not guarantee 100% safety, it still provides you with a layer of protection, without which you will be exposed to online threats. Use it in tandem with DKIM and DMARC to define a complete email authentication policy that will detect forgery on all levels.


